
Table of Contents:
BatchImageProcessor was the first piece of code that showed me,
how programming can help in solving actual problems one might
encounter in their everyday life. What started off as the
"outdated_main.py" in the repository - a few lines that changed
extensions of batches of pictures - after many months got
resurrected and helped me in other ways. A non-public version of
code allowed me to easily resize, apply filters and save in a
uniform format pictures that I intended to use while training a
neural network.
Near the end of my dental internship I found fun in
developing a windowed app with a rather simple GUI. I began with
the frontend part of the project, with intention on bending my
previously working functions to fit the app, rather than building
the GUI to use the code.
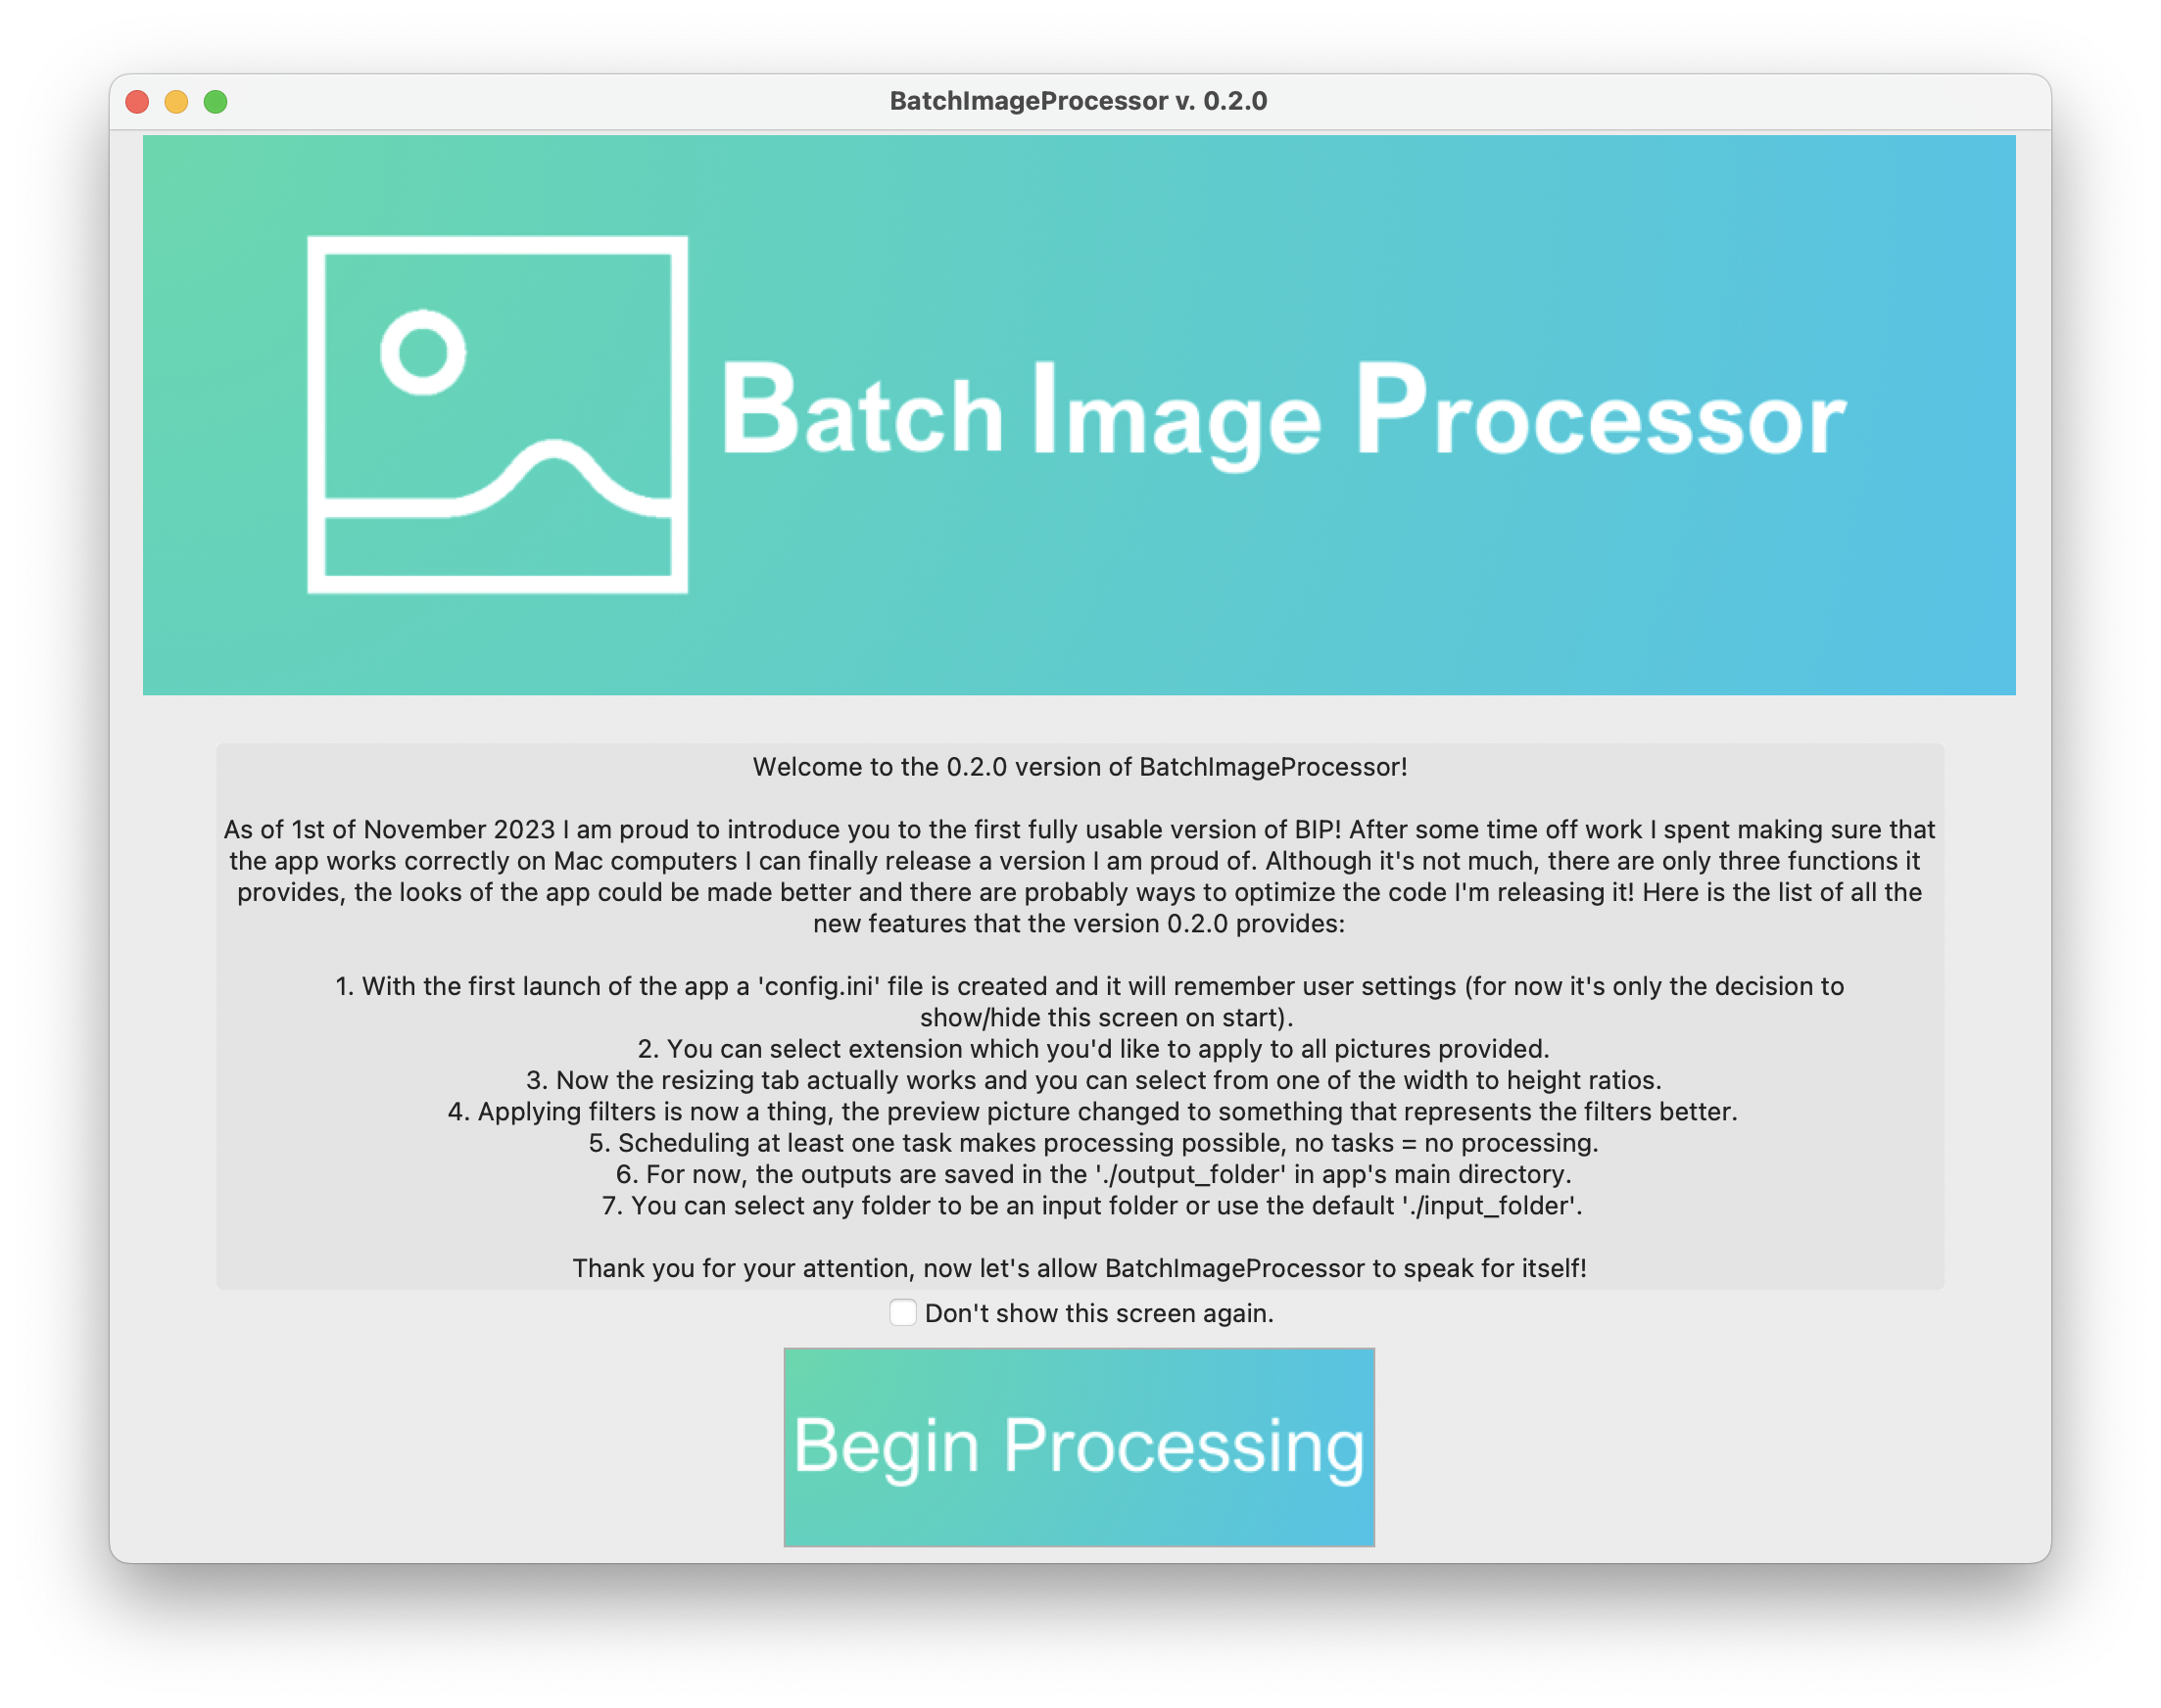
Let me introduce you to BIP v. 0.2.0! We start off at the welcome
screen of the app. Once you click the "Begin Processing" button,
the screen will disappear and you will see the main screen of the
GUI. There are four main parts to this screen and we'll take a
look at each shortly.
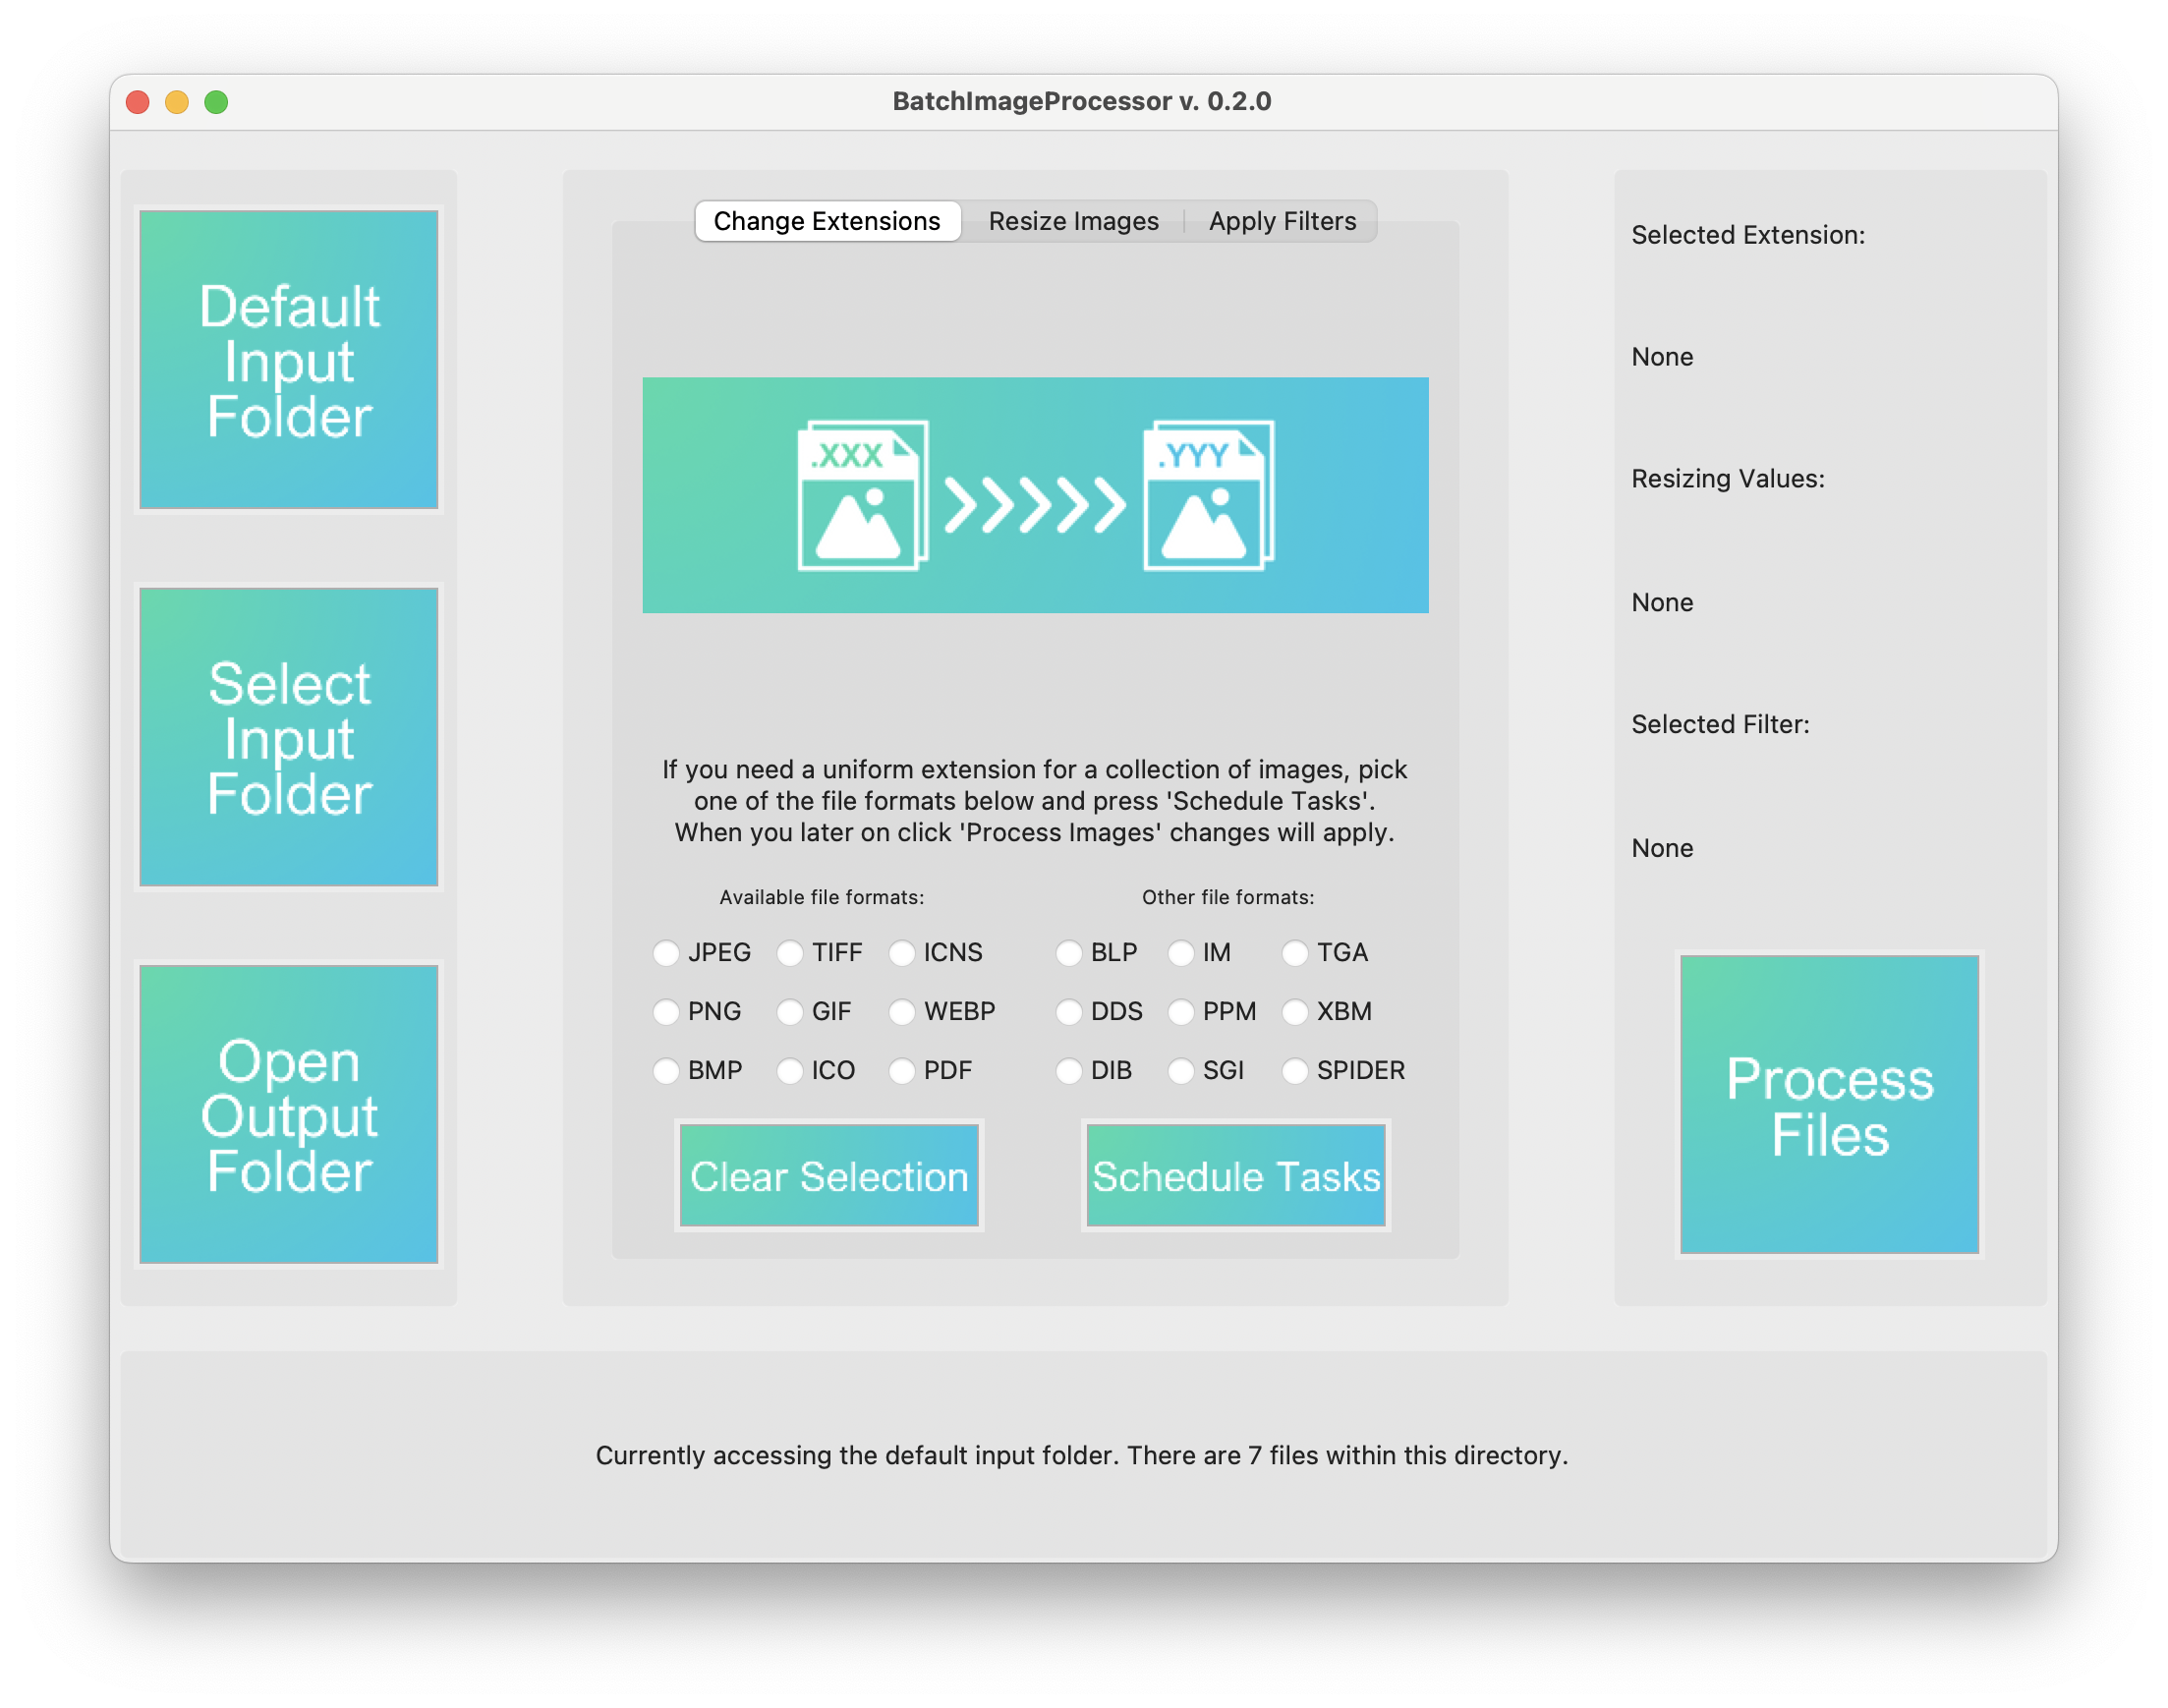
The app operates within a single screen wich does not change that
much during operation. As I mentioned above we have four main
parts of the screen, that we have to pay attention to. Let's go
through each and discuss it in more detail.
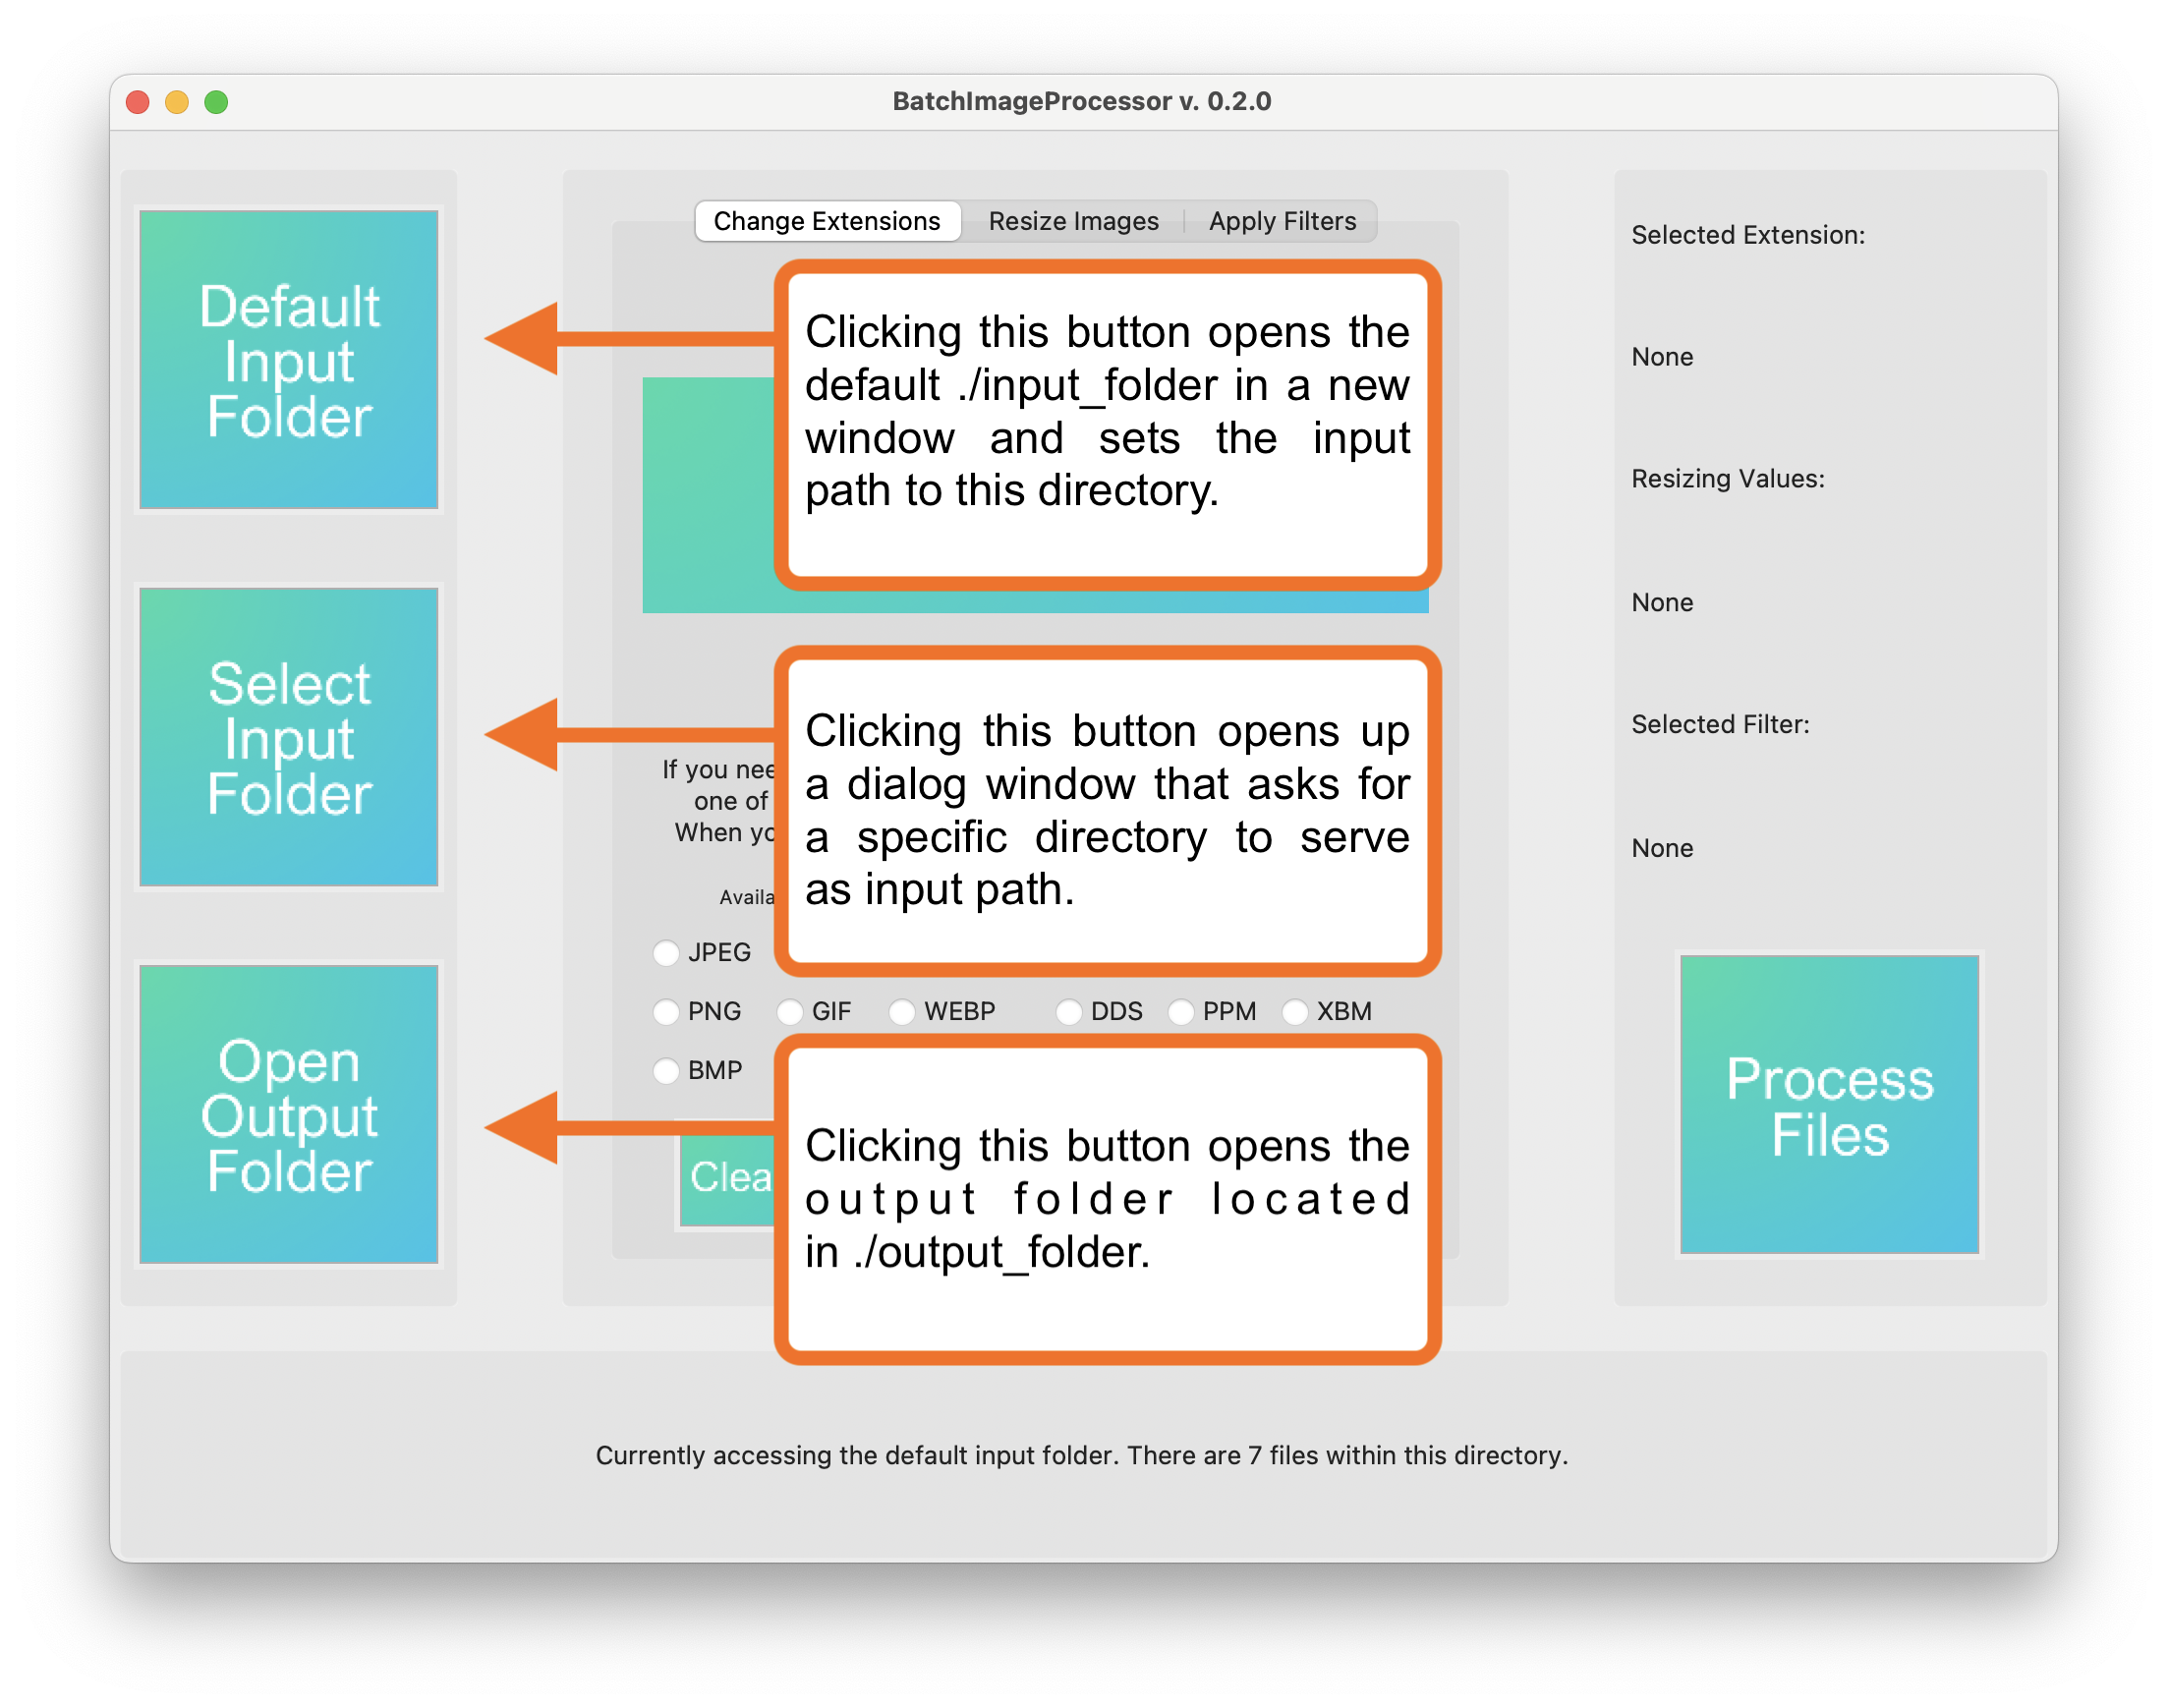
This column, visible on the left of the main screen,
serves as a way of feeding the app pictures and then
getting back the results. The buttons, are pretty easy to
follow - the top one ("Default Input Folder") when clicked
opens up the input folder located inside the app's main
directory. The "Select Input Folder" button opens up a
dialog box that asks for a directory where the desired
batch of images for processing is. The last one, "Open
Output Folder" opens up a window with all the output files
present. For now it redirects to the native,
./output_folder directory. In a future update I might
consider creating an output directory within the
user-specified input folder.
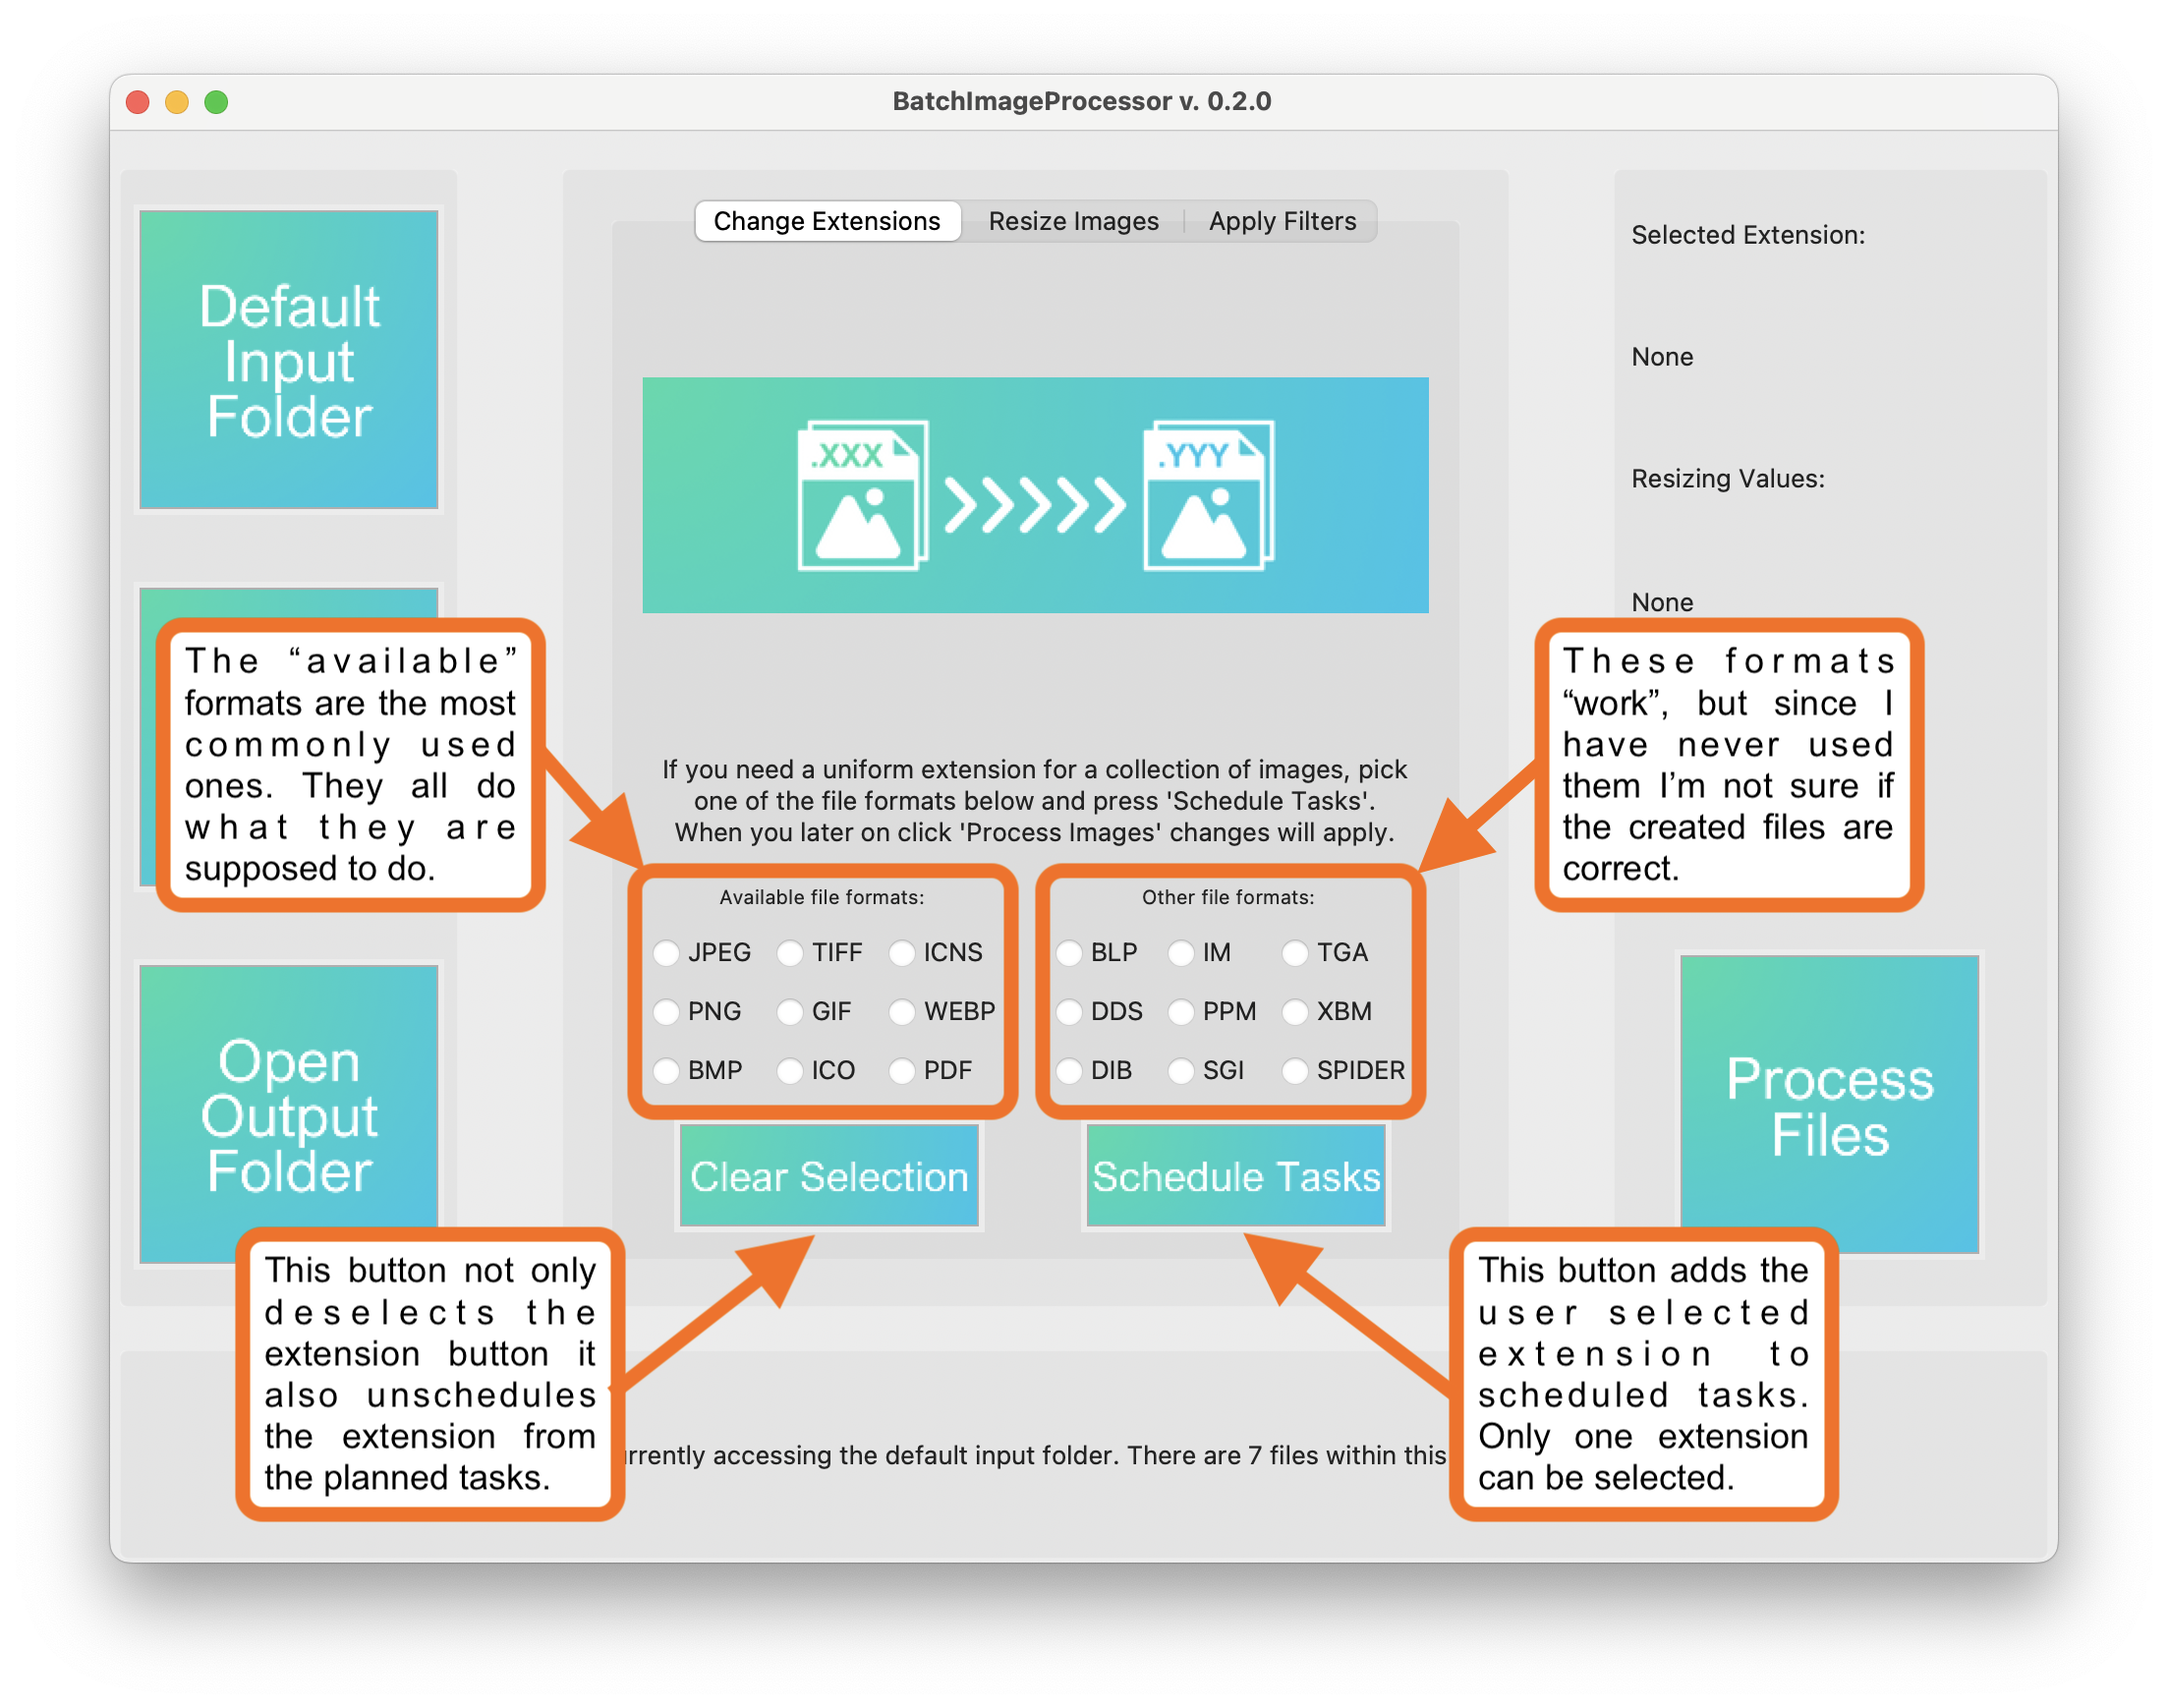
This screen is the first of three tabs that are available
to the user. It's straightforward in it's purpose I
believe, as the whole app was meant to be. The top
decorated with a banner image and a handy description
below, explaining what this tab is all about. Here you can
select one of the radiobuttons to pick an extension you'd
like to finish with. You can clear your selection with the
bottom-left button or add the extension to the "schedule",
since you will be able to complete multiple tasks at once.
The "other file formats" are sort of experimental
extensions. They work as far as I'm aware, but I'm not
sure if the files that are created comply with that the
user has in mind when using them.
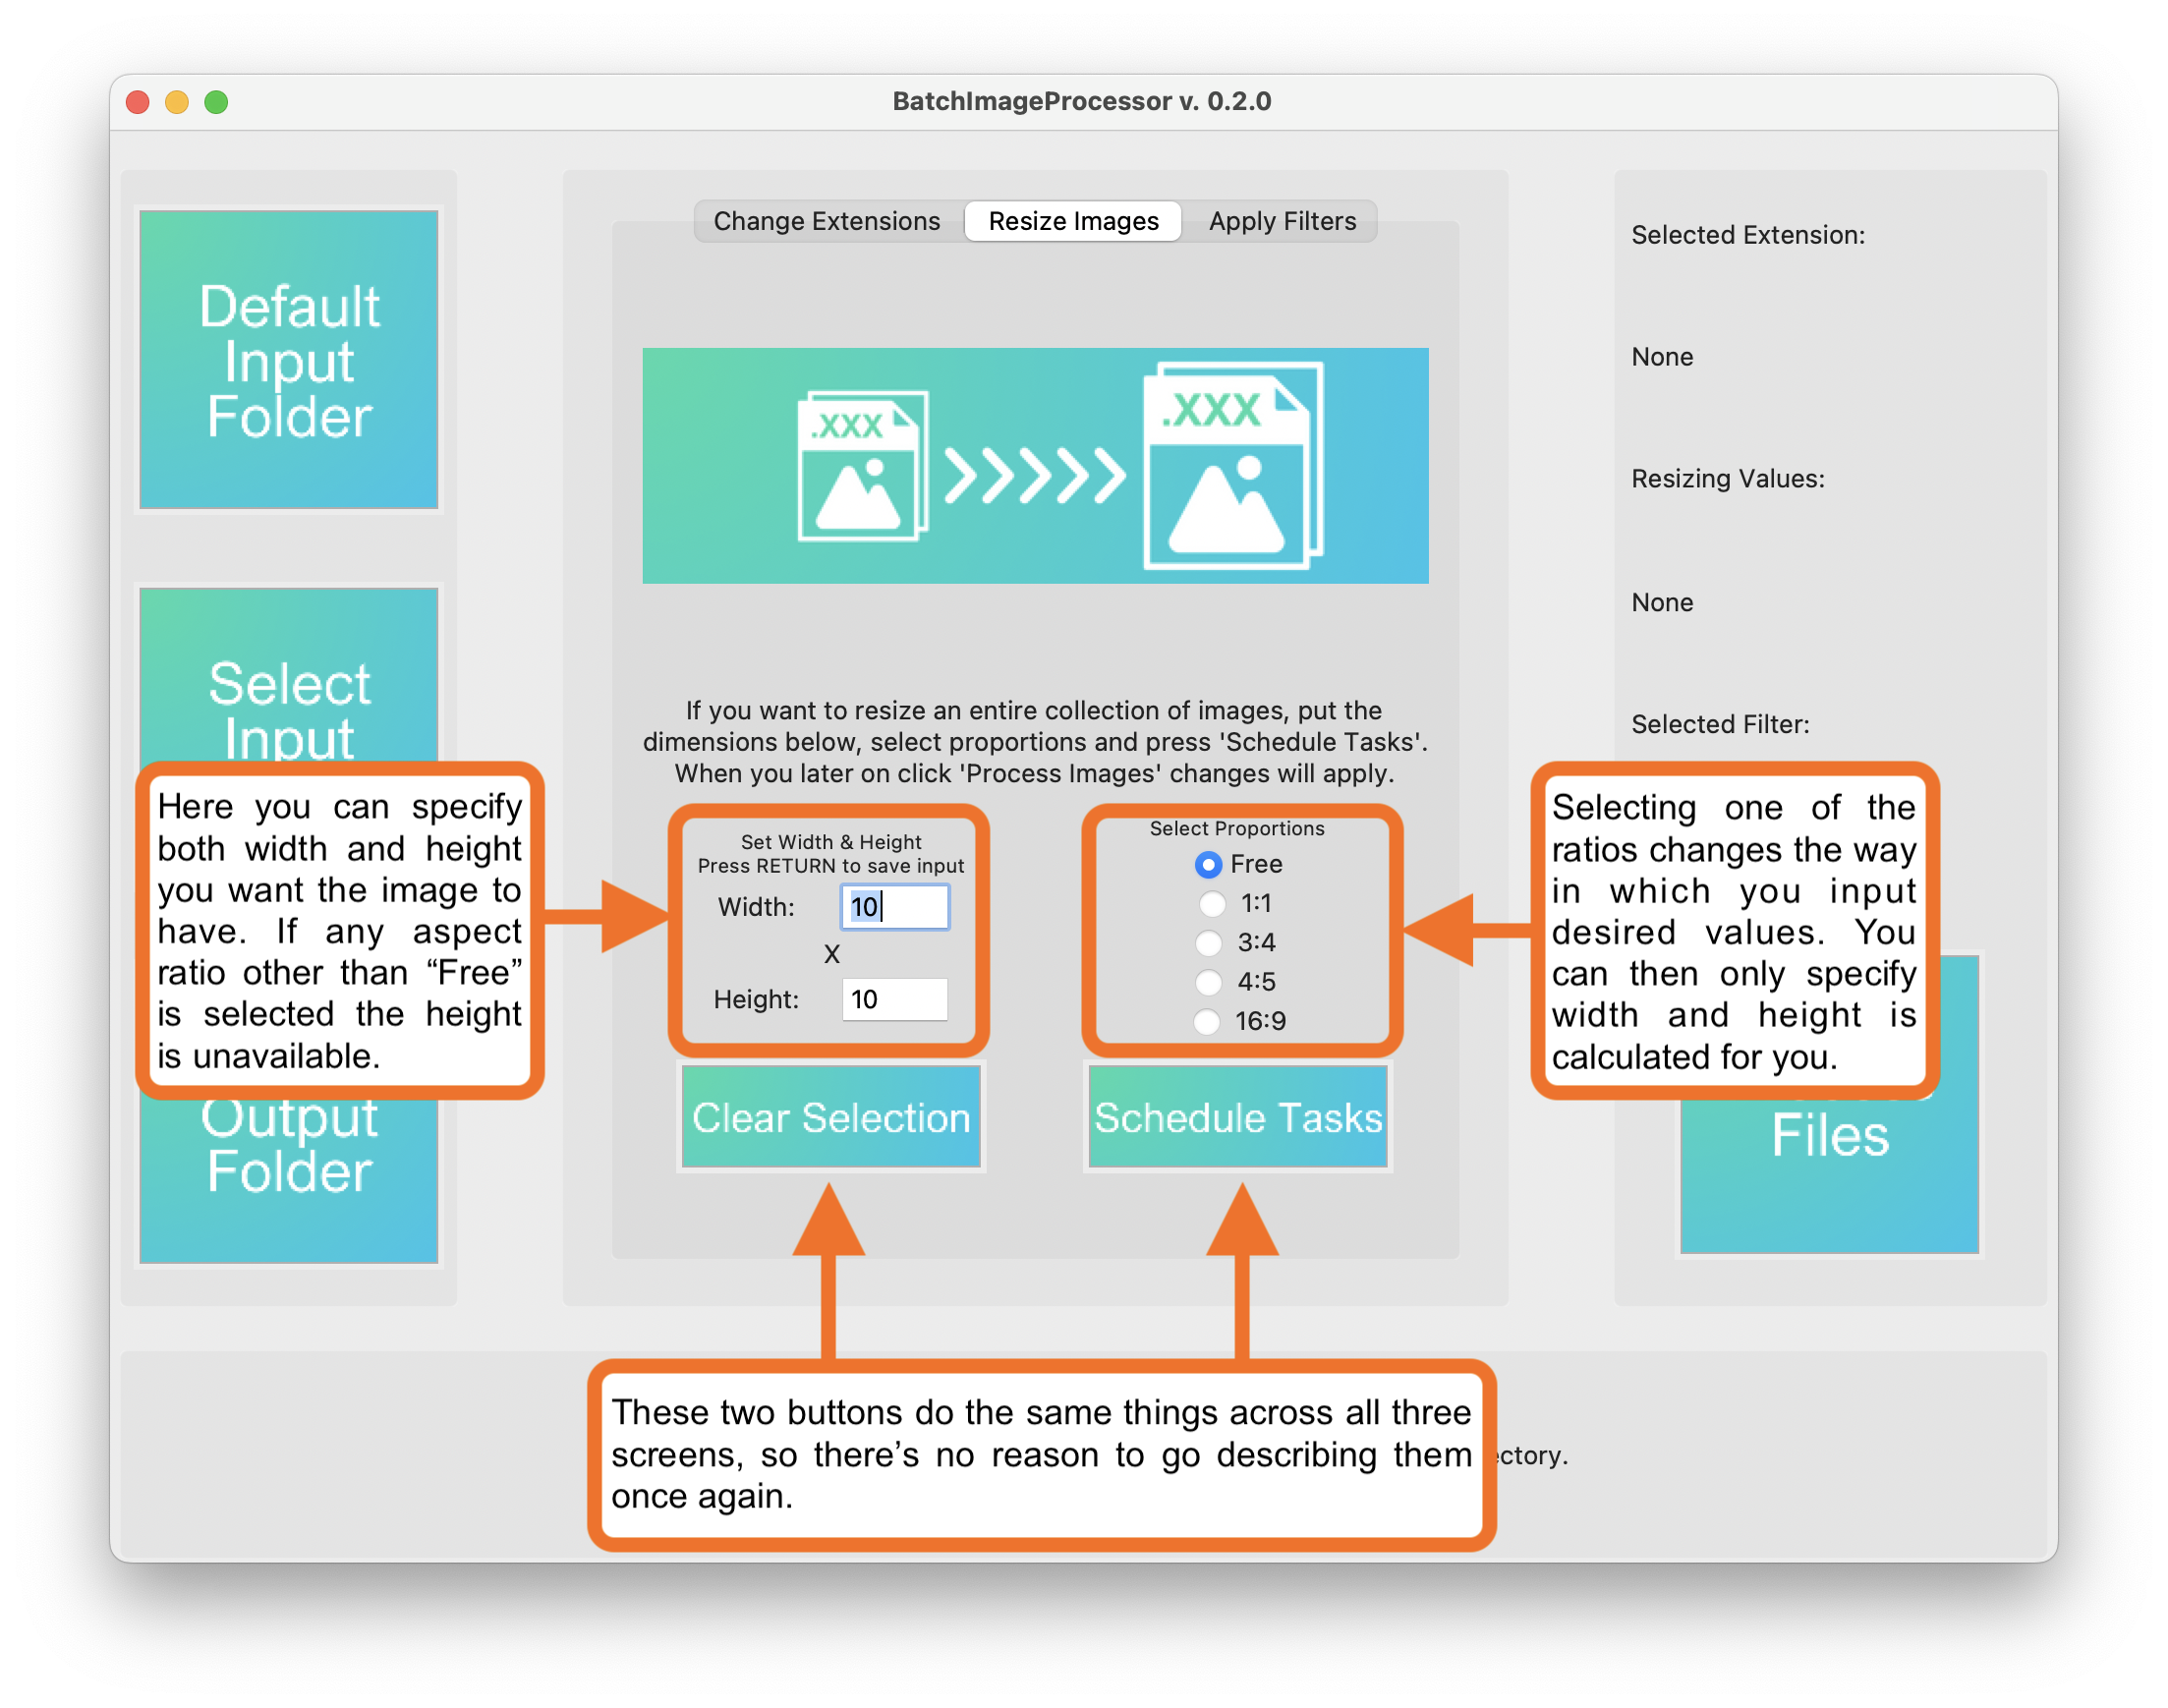
The second tab shows a simple resizing tool. Again, the
banner at the top and description quite blatantly describe
the usage of this tab. You have two input fields, where
you can type in the dimensions you would like to resize
your images to. On the right-hand side there are five
proportion settings to choose from. When you select
anything other than "Free" the height input field becomes
blocked from user input and the value is calcualted
automatically by the app. Just like in any of the three
tabs - if for some reason you want to clear selected
values press "Clear Selection", which will reset the
ratio, width and height. If you want to add the new size
to the scheduled task click the "Schedule Task" button.
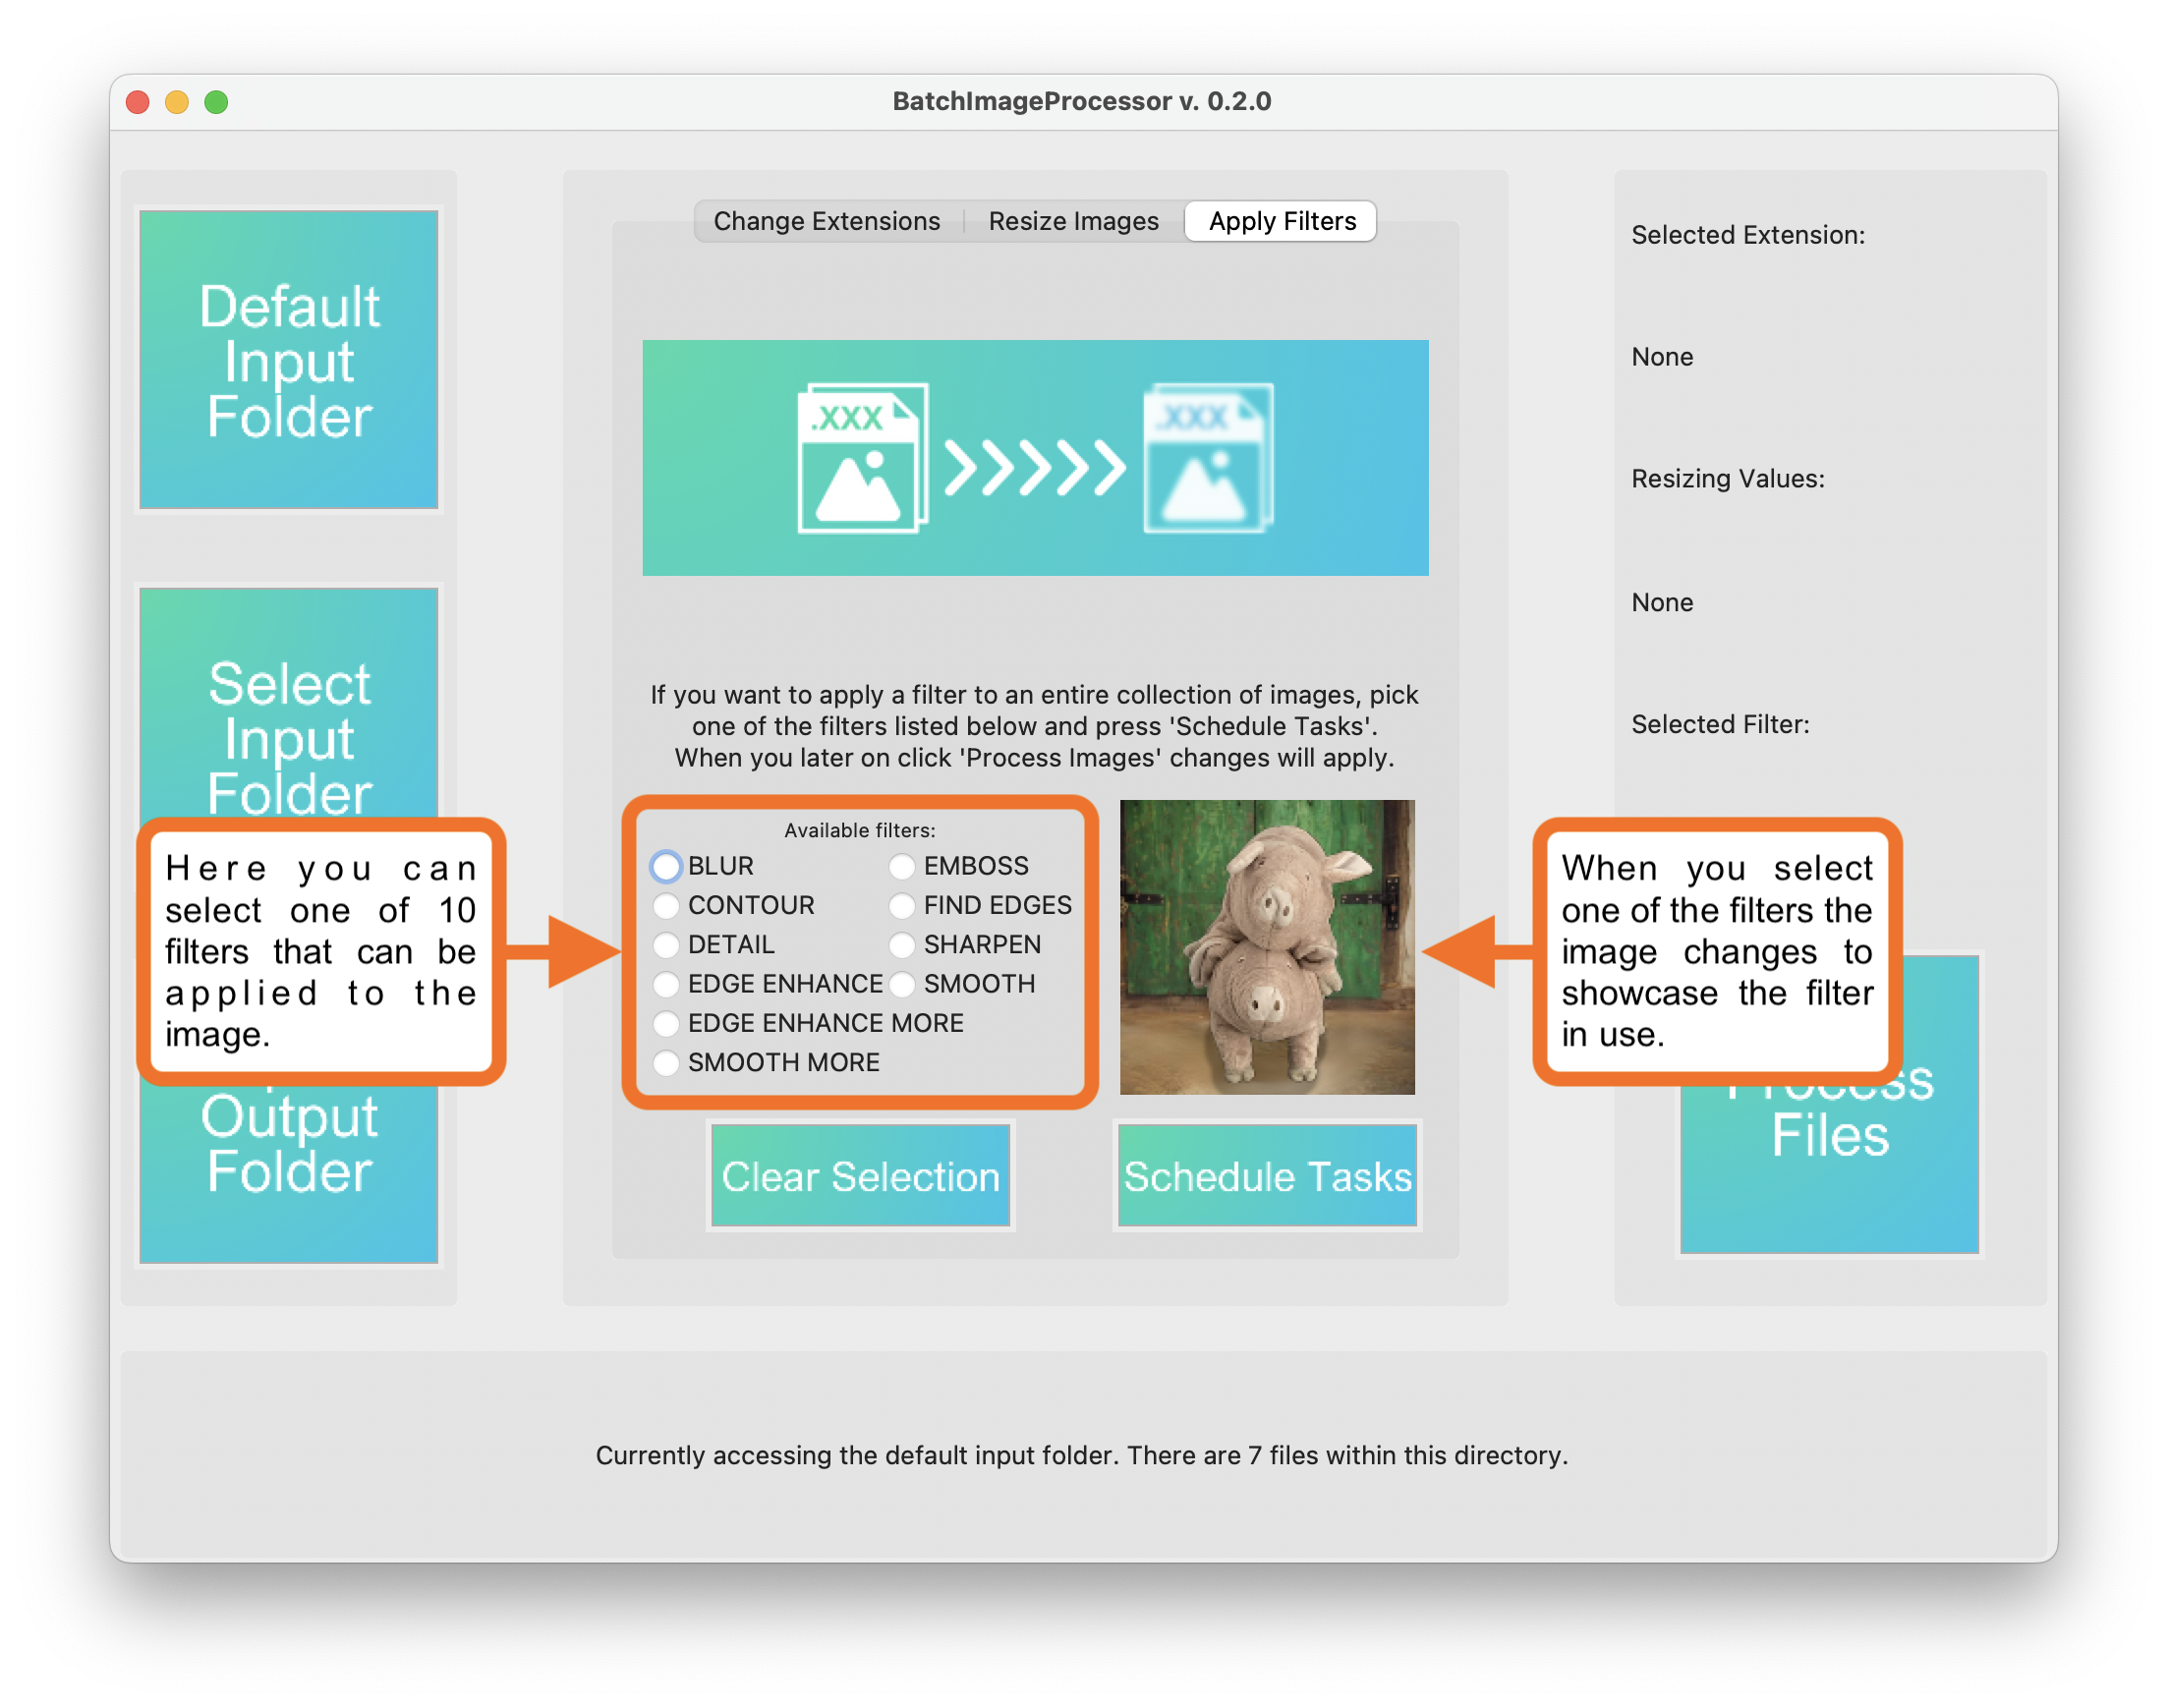
The last tab looks fairly similar to the previous ones.
You have the banner and the description that are supposed
to explain the use of this screen. Further down on the
left there are ten radiobuttons corresponding to filters,
at the bottom there are the two buttons that we are
already familiar with. A new addition is a square picture
of two plush piglets stuck one on top of the other with
some sort of wooden gate in the back. This picture changes
as the user selects the filters to show, what each filter
looks like when applied.
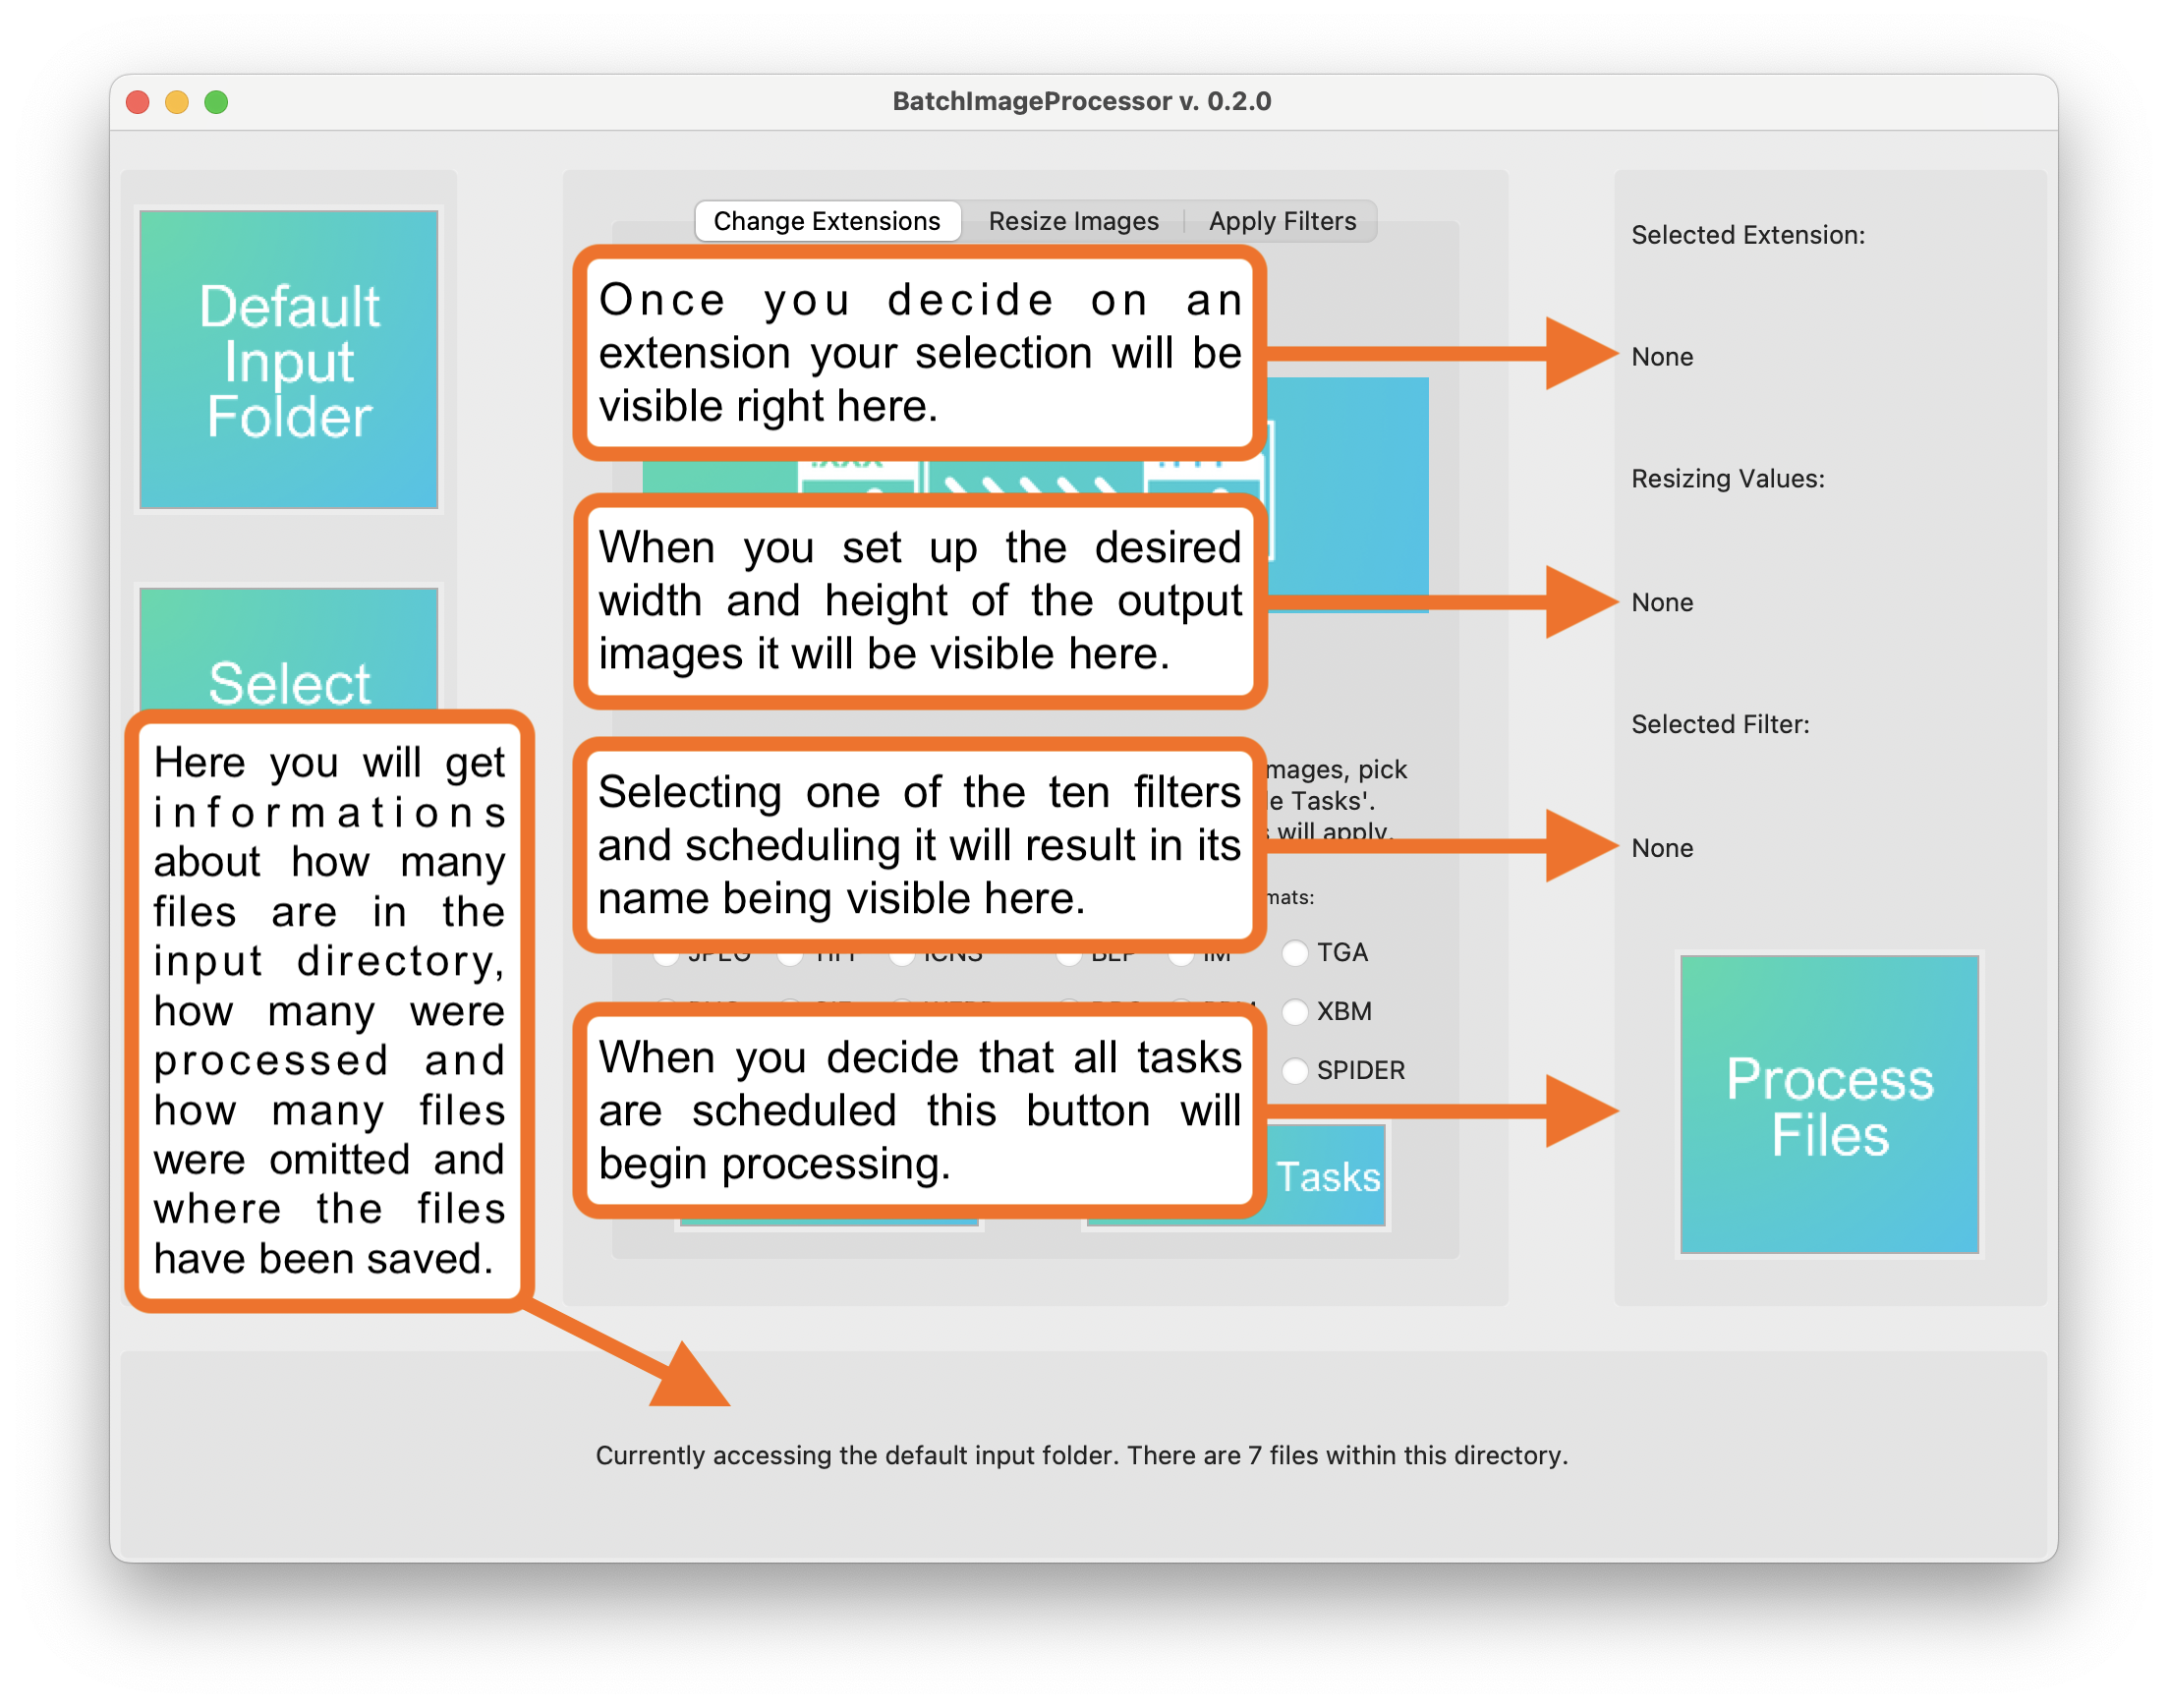
Scheduled Operations & Progress Monitor
The last column on the right is devoted to the summary of
the changes that are about to happen. As you add items to
the schedule, the "None" texts are replaced with the
correct informations, so that before you press the
"Process Files" button you can make sure that everything
is scheduled as you want it to be. Below all other parts
there's a bar that displays short messages such as the
amount of files in the input directory, reminds the user
to schedule at least one task (if they press process
images before planning anything) or summarises the
processing. It returns information about how many images
were altered, how many files omitted and where to was the
omitted_log.txt saved.
In the current state this "app" has been tested only on
MacOS. It might work on other platforms, I'm not denying that, but I
haven't yet tested it on anything other than my MacBook. The
functionality sattisfies me for now, although ther might be some
new things added in future updates. For now, next thing to change
will be a bit of GUI, to make it less of a mess.
If you wish to download BIP for yourself and try it out, remain
updated about the changes that take place and give me feedback
about the app please visit the repository linked
here.
Feel free to email me using the contact sheet or catch me on
websites linked below.


